 |
Video: In the video tutorials you can find a video about the Project Security. |
- What are Roles and Autorizations?
- How to define, customize and remove roles?
- How are project permissions granted and removed for users?
What is Project Security?
In Project Security, access rights of the project can be defined and assigned on the basis of user roles.
As a Project Admin you can define roles in the project in LCM Digital, invite new users to this project in LCM Digital and assign the defined roles to them.
These roles will influence the users‘ access to different sections in LCM Digital, namely Overall Process Analysis, Takt Analysis, Takt Zone Iteration and Process Planning.
The roles can be defined in a way that the users given the role would or would not be granted the permission to update/remove/read/create instances in the Overall Process Analysis, Takt Analysis, Takt Zone Iteration and Process Planning.
For instance, you can define a new role for the construction managers and give them the permission to read the Overall Process Analysis but read and update the Takt Analysis and read, update and create Takt Zone Iteration and Process Plan.
![]()
Roles definition
1. Click on Project Security on the main menu.
2. Click on Roles.
3. Click on New to define a new role.

1. Choose a name for this role, for instance Designer.
2. Choose a Role Type from the dropdown list. The Site Manager and Trade Manager Role Types are defined roles in LCM Digital, which can be used if desired.
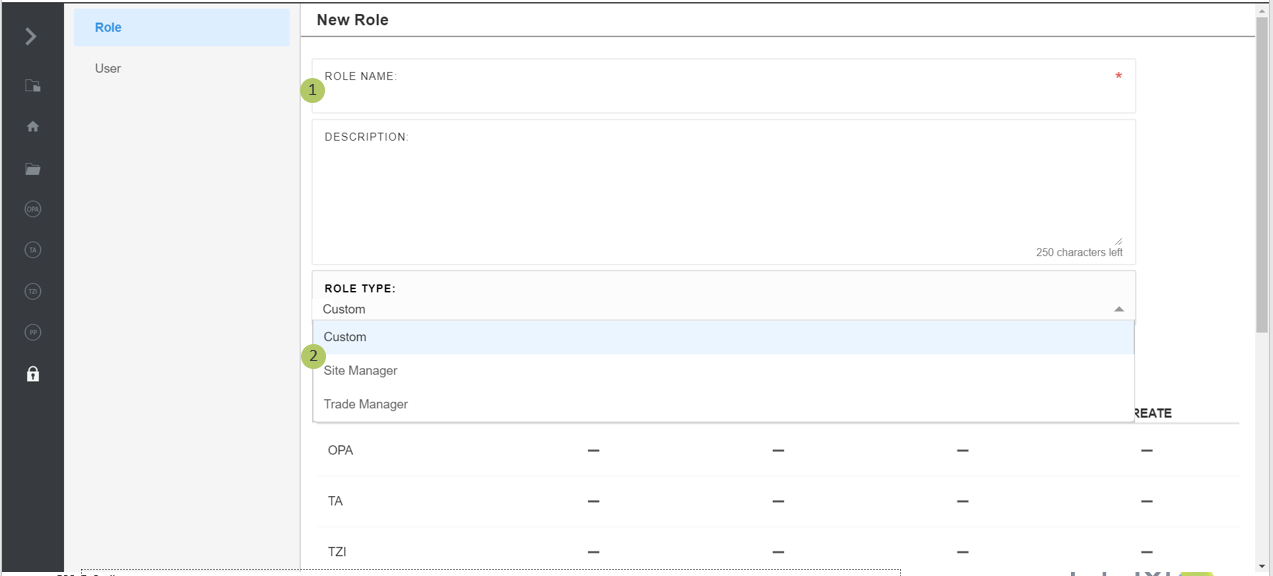
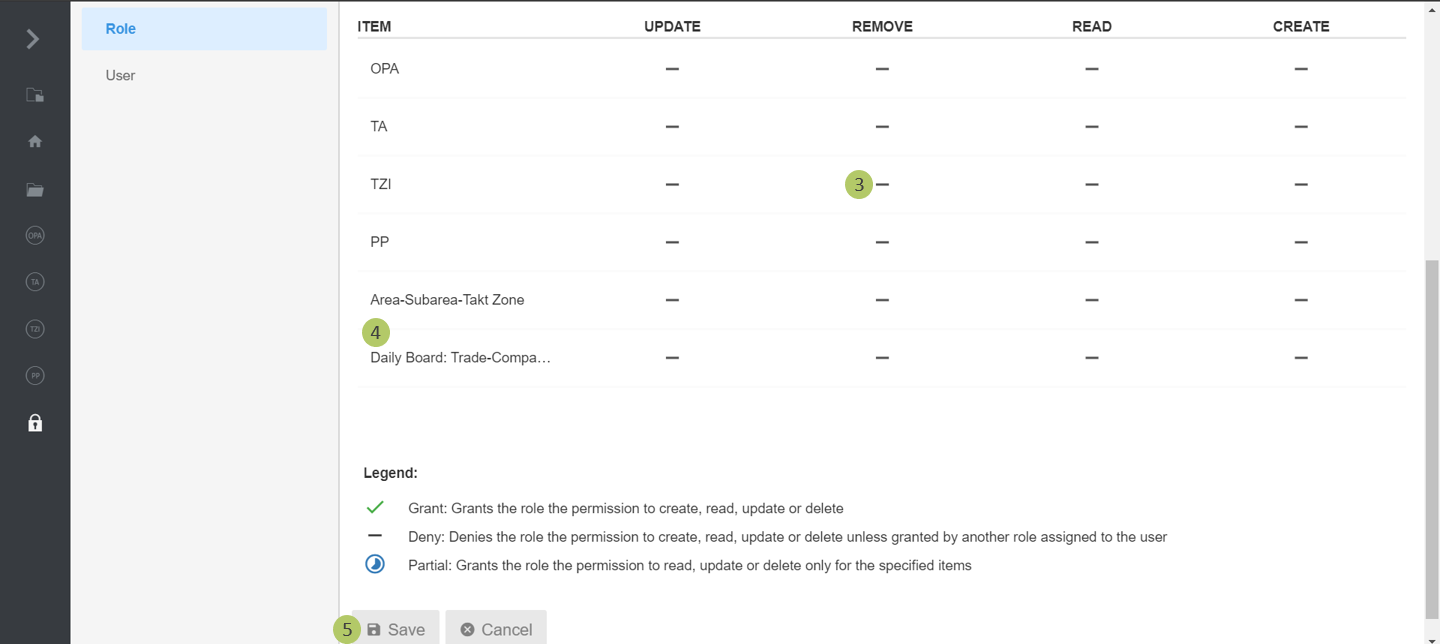
3. Click on the dash signs for each item namely OPA, TA, TZI, PP, Area-Subarea-Takt Zone and Daily Board: Trade-Company Phase in order to grant full or partial permission to update, remove, read or create those items.
4. Manage the partial permission here. Partial permission is used when there are more than one OPA, TA, TZI or PP and the permission should be given to a specific OPA, TA, TZI or PP. For instance, here the Designer can only update, remove and read OPA 3 and Overall Process Analysis 2.
5. Click on Save to save the information and proceed.
![]()
Detailed Authorizations
The authorizations of the roles can be expanded further to determine the individual authorizations in more detail.
![]()
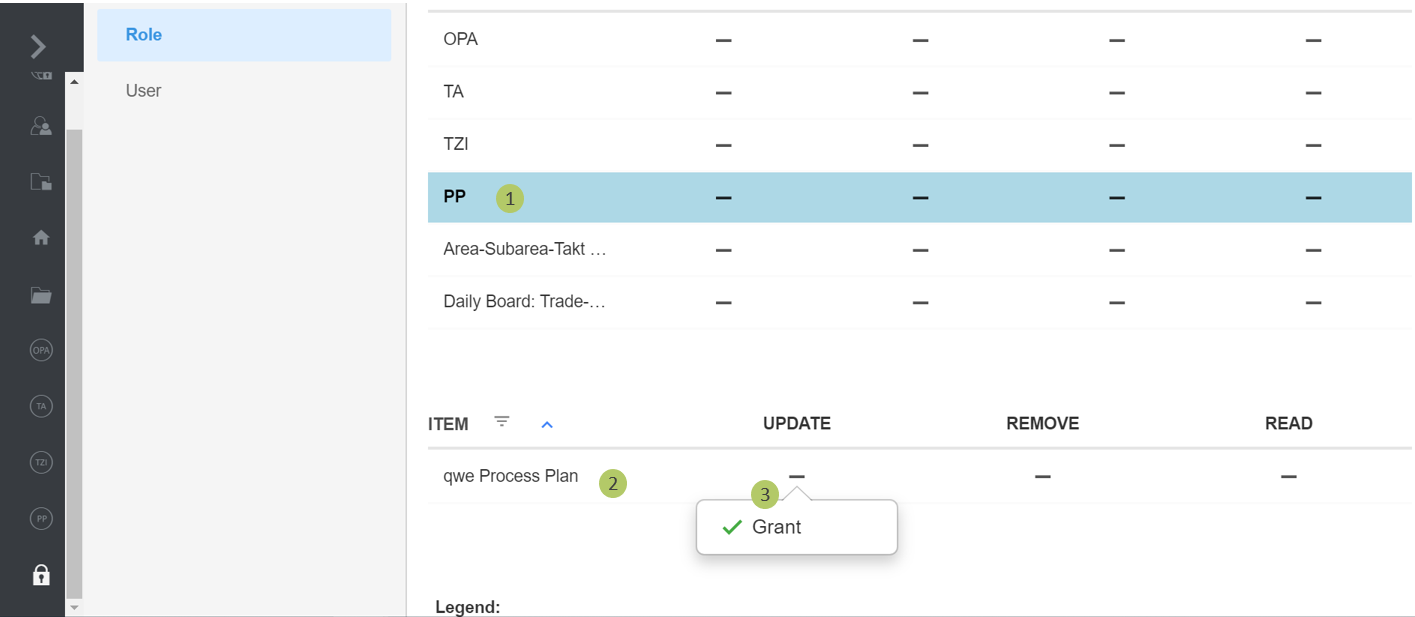
Main process steps
1. Click on the GPA, TA, TP or PP to make the respective authorization bar visible below the main process steps.
2. If process planning was selected in the first step, all process plans of the project appear here. With the symbol the entries are filtered.
3. Here you define the authorizations for process planning (or GPA, TA, TP) in detail.
![]()
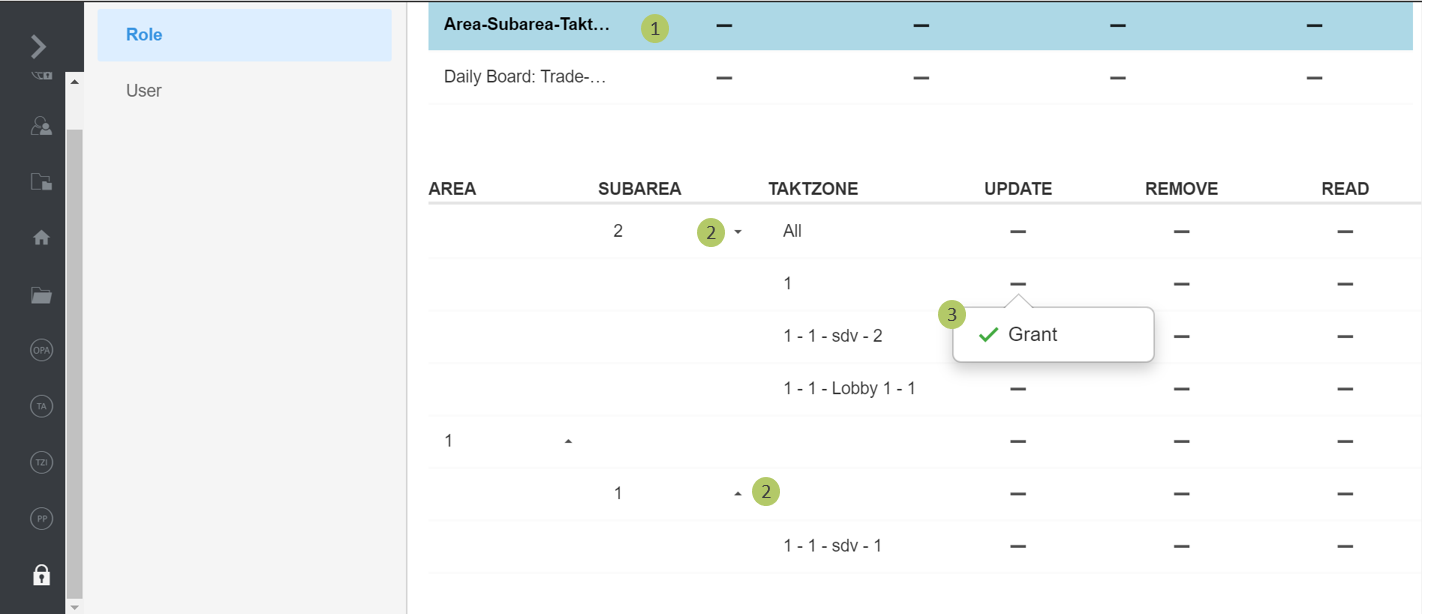
Area-Subarea-Takt Zone
1. Click on Area Sub-Area Takt Zone to make the permission bar visible below.
2. All areas of the project as well as its subareas and pour areas appear here, all of which can be displayed individually by clicking on the pop-up symbol .
3. Define the authorizations for the areas Subarea and Takt Areas in detail here.
Daily Board: Trade company phase team
1. Click Daily Board: Trade Enterprise Phase Team to make the permission bar below visible.
2. All companies, phases, trades and the associated teams (if defined) of the project appear here.
3. Define the authorizations for the trade enterprise phase team in detail here.
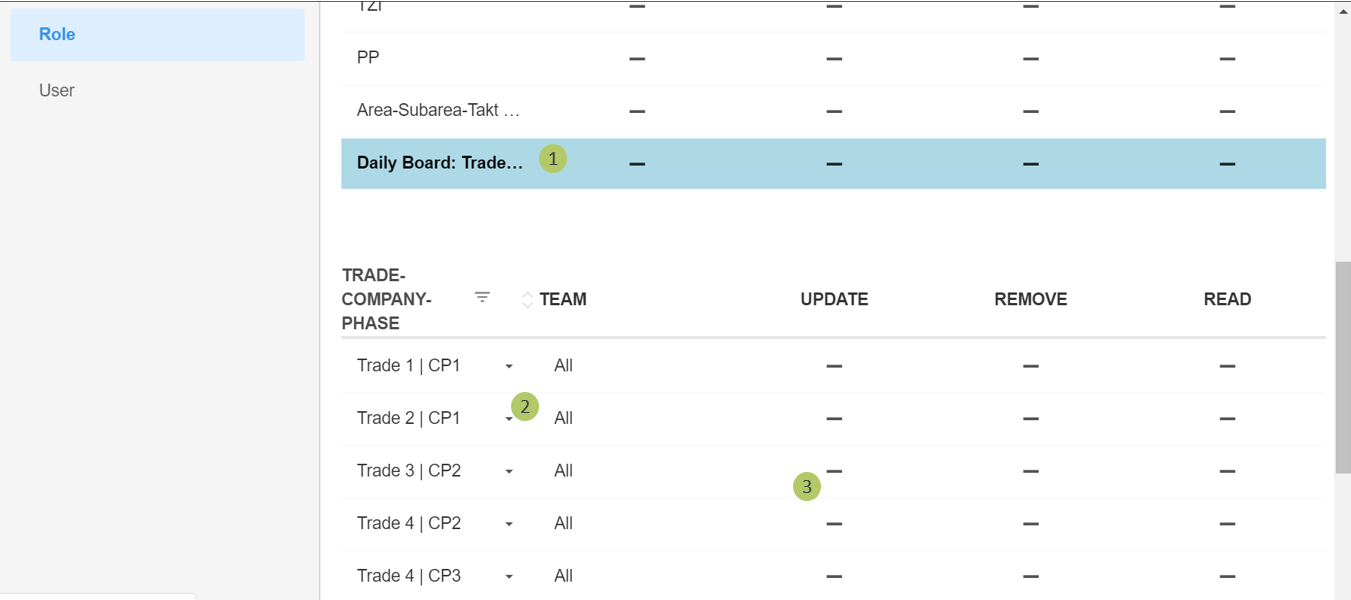
The trade company phase team Boden|LP5 can be updated, read and removed from the defined role here.
![]()
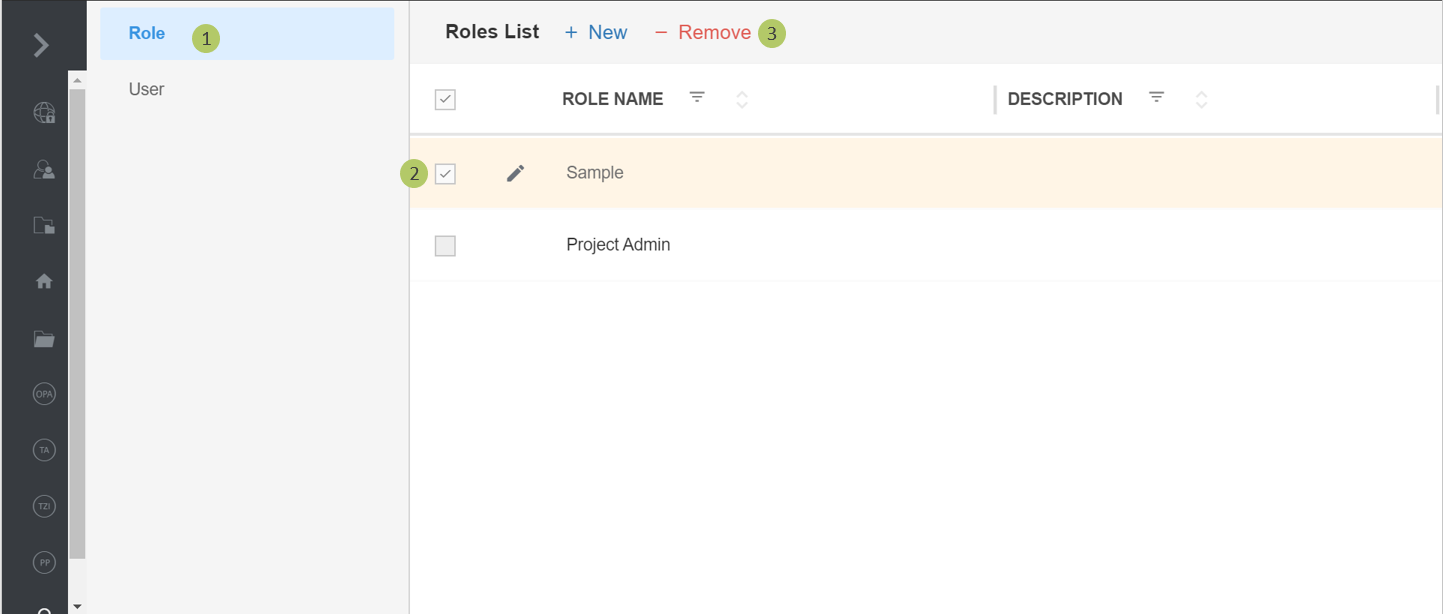
Remove Roles
1. Click on Project Security on the main menu.
2. Select the Items from the list of Roles by clicking on the checkbox.
3. Click on Remove to delete the selected Role/s.
![]()
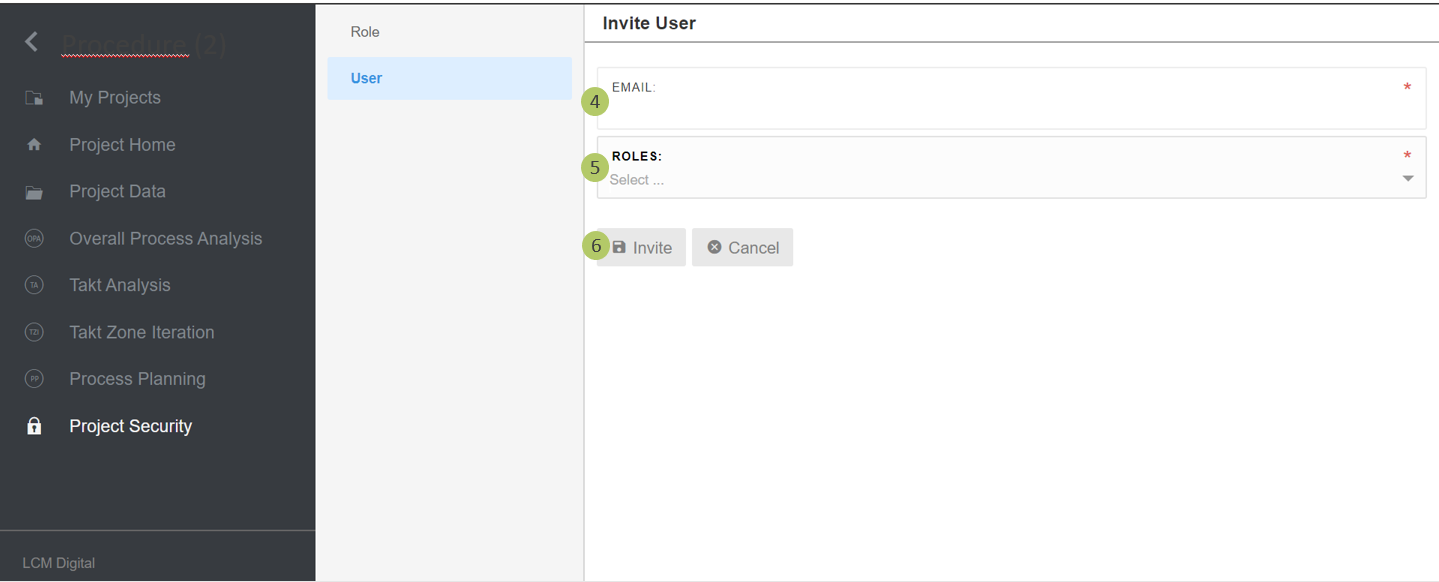
Invite Users to the Project in LCM Digital
Users are invited to a project by email. At the same time as the invitation, the role with the corresponding predefined authorizations is assigned.
1. Click on Project Security on the main menu.
2. Click on User.
3. Click on Invite User to invite a new user.

4. Give the Email address of the user to be invited to this project.
5. Select a role from the dropdown list.
6. Click on Invite. The user then receives an e-mail with an invitation link. Users not yet registered in LCM Digital will be redirected to the registration page. Registered users will be redirected to the welcome page of the project via the access link.
![]()
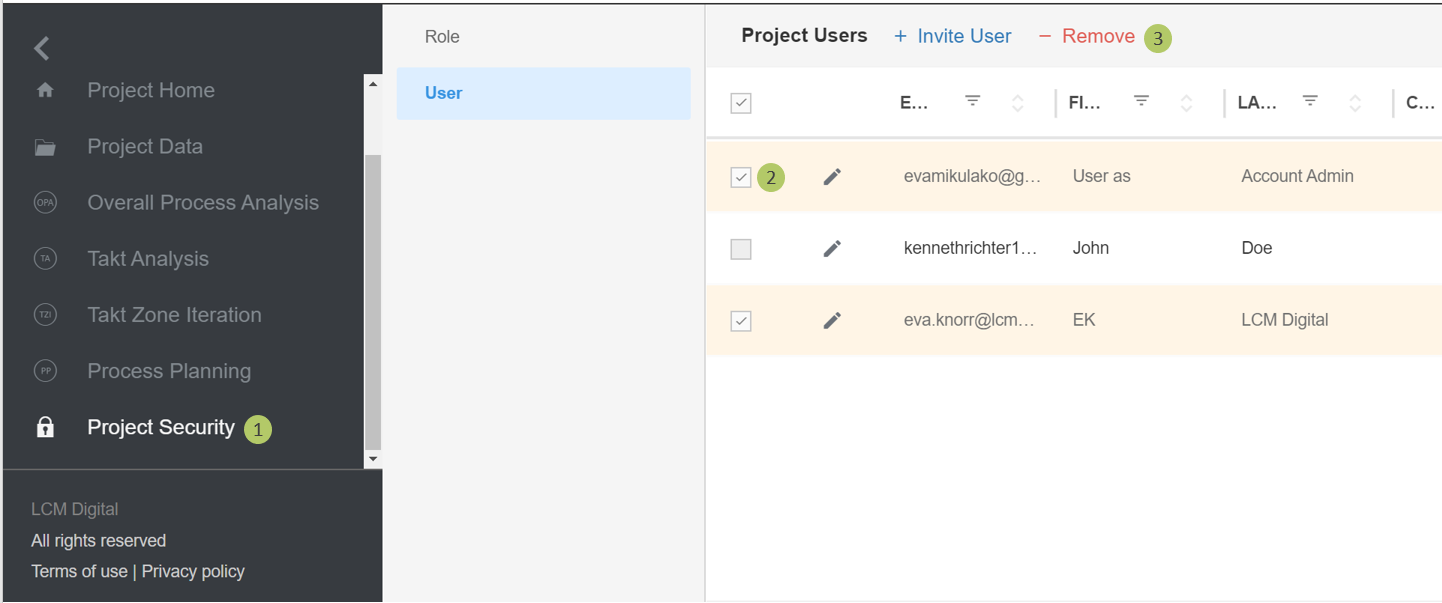
Remove User
1. Click on Project Security on the main menu.
2. Select the Items from the list of Users by clicking on the checkbox.
3. Click on Remove to delete the selected User.
![]()